Showing posts with label Friday FYI. Show all posts

May 22, 2009

Make your own Celebration Platter

This morning I grabbed a cup of coffee and sat down at the computer to browse on The Find when I came across this Celebration Platter:

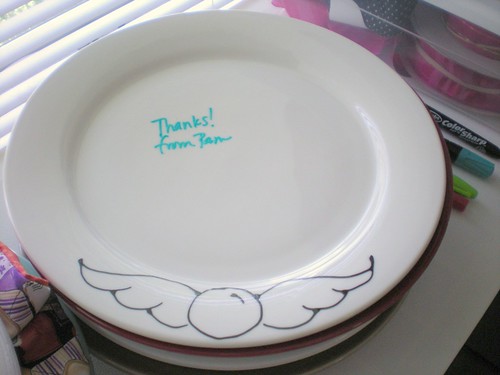
The description from Exposures says, Our Celebration Platter is the perfect gift for any occasion that's cause for celebration. New baby. Graduation. Job promotion. Commemorate the moment with this high-gloss white ceramic platter. It's large enough for all of your friends and loved ones to chime in with a special message. Just sign the plate with pen (one pen included; additional available for quicker signing), and bake in the oven for warm wishes that last a lifetime.

Their platter is on sale today for $46.99 and the pen is $11.99. Exposures charges $6.50 shipping for up to two pens. Yep, both of our plates use the same kind of food safe ceramic paint pen!

If you're like me - too thrifty and crafty to spend that much money on something that you could create yourself, you're probably thinking about how to make your own. And with all due respect to Exposures, our paint pens sell for less.

We currently sell them on Etsy for $10 each and shipping is free for up to 6 pens.

Here's how to make your own:

1. Get some of our pens in a couple of different colors. You could buy your own plate or platter at Target or another store for about $15-20. Just make sure it's ceramic or stoneware. Plastic will melt in the oven when you make the paint permanent.

2. Make sure your platter is clean - the paint pen is water based and surface oils on the plate will resist the paint. Make sure all your party guests have clean hands, too, so oily fingerprints don't cause the same problem.

3. Ask everyone at the party to use the pen to write something on the ceramic plate or platter.

4. When everyone has signed the platter, bake it in an oven for 30 minutes to make it permanent. (Instructions are written on the pen.) And it's dishwasher safe after you bake it, although I recommend hand washing all handmade items.

5. You could have everyone sign the platter at the beginning of the party and bake it during the party. If you're sneaky, you could get away with this without the guest of honor knowing what you're up to. The plate will be cooled and completely finished before the party's over and your gift will be the hit of the party and the guest of honor keeps your platter as a memento of the occasion.

This is a very personal, sentimental gift idea. Got a wedding or wedding shower, anniversary, or birthday coming up?

Wow, what a perfect gift!


PS: How is this platter different from a Pass It On Plate? Our plates have a tracking number on the back and they're intended to travel from person to person. We include the pen so each person can write something on the plate as it travels - just to add to the fun.

January 30, 2009

Cushion Cover Replacement

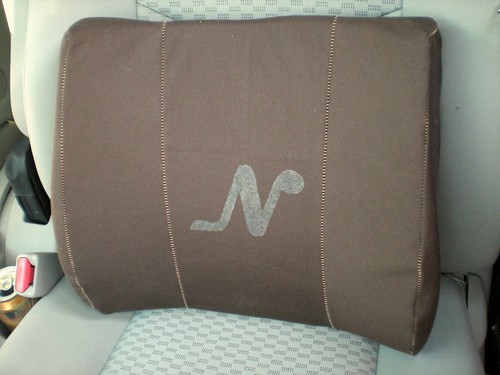
This isn't really a tutorial, but I wanted to invite you into my sewing studio to show you how I made a new cover for my dad's lumbar cushion. He uses this in his car and the old cover was falling apart. He couldn't find a replacement to buy, so I offered to make him a new cover. (I'd never made anything like this before but figured I could copy the old one.)

Anyway, here's a step by step to show you what I did - maybe you can use this inspiration to turn a much-loved beat-up item into an ego-boosting craft project.

(Nothing like a successful first attempt to boost the ol' self confidence...)


Supplies, originally uploaded by passitonplates.

Supplies:
The foam cushion,
the old cover (in blue, upper right),
heavy twill fabric in brown,
paper grocery bags,
a sharpie...
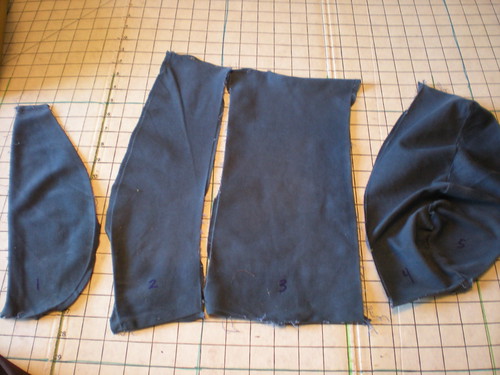

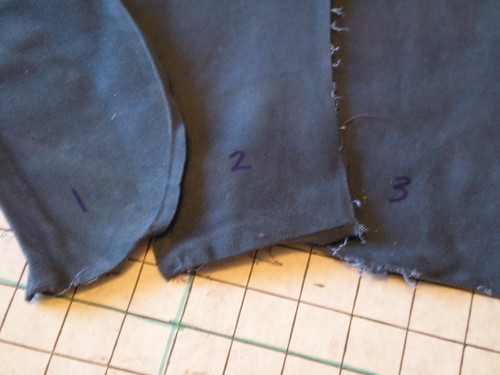
The old cover was methodically disassembled, originally uploaded by passitonplates.

The old cover was methodically disassembled.

Each piece was numbered so I knew how the new pieces needed to be sewn back together.


Anal retentive planning, originally uploaded by passitonplates.

Anal retentive planning: If I didn't number the old pieces as I separated them, I would have ended up with a two-headed giraffe instead of a lumbar seat cushion.
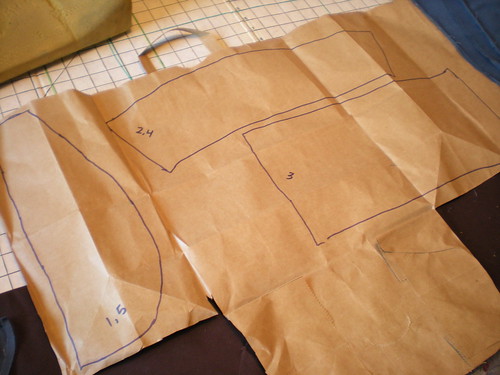

Making the new pattern, originally uploaded by passitonplates.
Making the new pattern:
Each numbered piece was traced onto the grocery bag, then cut out.


Laying out the pattern pieces, originally uploaded by passitonplates.

Laying out the pattern pieces.
Some of the pieces needed to have a little stretch to them to fit nicely around the foam form, so I cut them on the bias. Other pieces were cut straight.
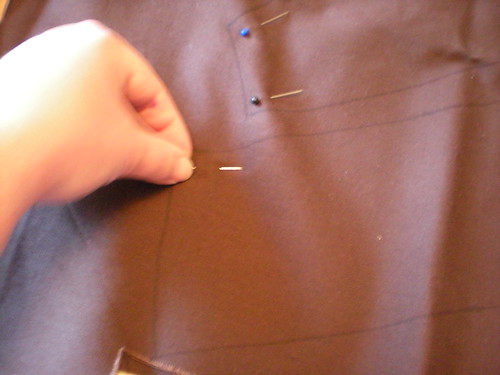


Everything needs to be pinned, originally uploaded by passitonplates.

Everything needs to be pinned.

I'd be frustrated if the fabric slipped while I was cutting it, so I pinned the fabric halves together beforehand.
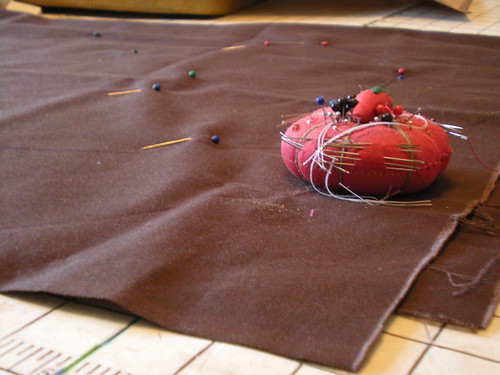

Ready to cut, originally uploaded by passitonplates.

Ready to cut.

This is the pin cushion my mom used when I was a little kid. She sewed all my clothes when I was in kindergarten and first grade, made all of my many Halloween costumes, taught me how to sew, and helps me figure things out when I get in a jam.

She's the one who came up with the first bonnet-style PlateWrap prototype. Before the round cover with the elastic band, I was working on a quilt-like square thing that wrapped up the plate like it was a baby bunting. It was labor intensive, used a ton of fabric, and would have been priced way beyond reason. Mom's bonnet style cut way down on fabric and labor. Plus they're a lot easier to slip on the plate.

My mom is smart.
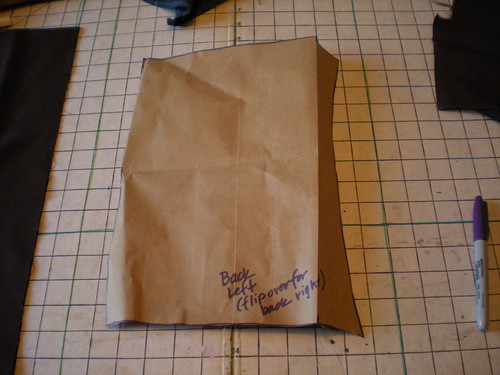


I wrote notes to myself on the pattern pieces, originally uploaded by passitonplates.

I wrote notes to myself on the pattern pieces.
If I hadn't, I would have been so confused when it was time to sew the pieces together.
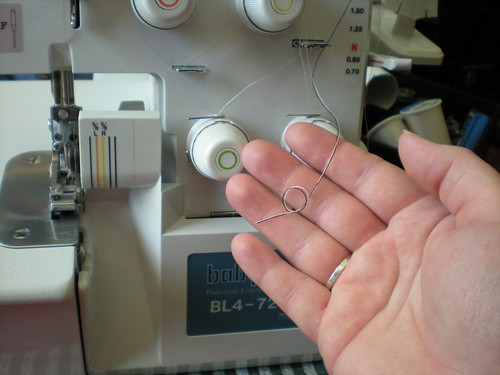

Changing thread colors, originally uploaded by passitonplates.

When I pulled the serger out, I realized it was threaded with white and beige threads. Better switch the white for black. (I had a limited supply of colors at the moment.)

I know this doesn't have anything to do with the cushioin cover, but since it was part of this particular project, I wanted to show you what I needed to do.

To switch the threads, I snipped the white thread and tied it to the black thread...
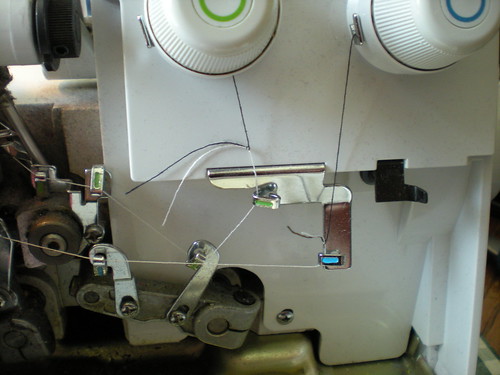


Draw the threads through the eyes, originally uploaded by passitonplates.

Slowly and carefully the threads were pulled though the eyes until they reached the eyes in the upper and lower arms ...
(Only the top two are needles; the bottom two are arms.)
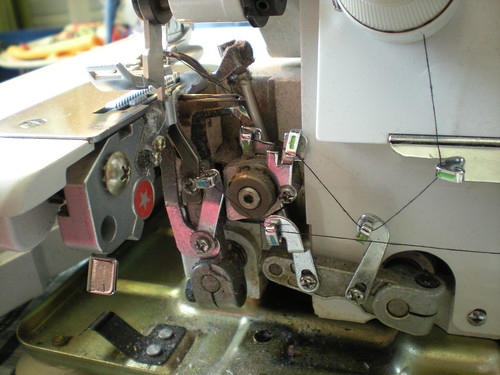


Green green, blue blue, darnit. Where are the tweezers?, originally uploaded by passitonplates.

Green green, blue blue, darnit. Where are the tweezers?
This serger belonged to my very talented step mom, Judy, who quilted and made other beautiful things. When she passed away, my sister Sharon got the serger, but I'm lucky enough to be able to use it for the time being.

Every time I pull it out to use it, I break a thread and have to re-thread the darned thing. After a few failed attempts to get the threads threaded in the right order, I give up and pull out the How-To video that came with the machine. I watch the lady with the long fingernails thread her machine, rewind the tape 10 seconds (so it's ready for the next time I have to re-thread the beast machine,) ... then I go back to the sewing table and successfully re-thread this machine.

I always joke that the only headache Advil can't cure is what you see in this picture.

I now have 14 grey hairs because of this step ...
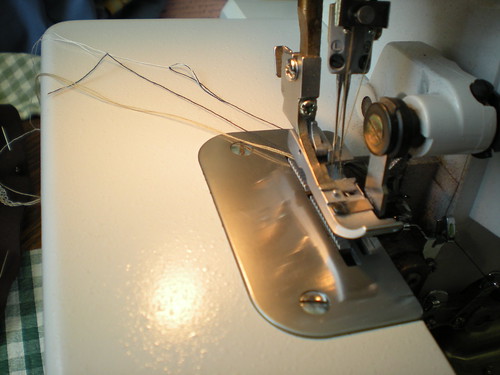


Thread's pulled through. Hope it works!, originally uploaded by passitonplates.

Thread's pulled through. Hope it works!
At this point I need to test to make sure the threads chain as they leave the presser foot. No chain means no stitch. No chain means un-thread everything and start over, trying to thread each color-coded set of eyes in the right order.

No chain means more grey hairs for me. I'm holding my breath as I press down on the pedal... Does it chain?


Whew - it chains!, originally uploaded by passitonplates.

Whew - it chains!
I think that's the first time I got this silly machine threaded right on the first try. (Without watching the video first.)

Probably because you were watching me do it.

Once I started sewing, I decided it needed some kind of embellishment. Since this cushion is my dad's he wouldn't like anything too frou-frou, so I went with a subtle stencilled monogram.

Clean and masculine.
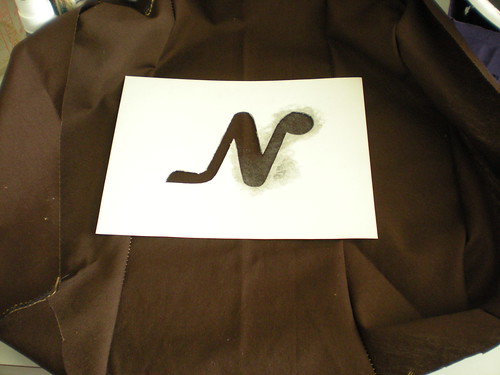
Without any special stencilling supplies, I was able to get a nice image from some heavy paper and craft paint. I just dug into my paper drawer... (Yes, I have a paper drawer. It's full.)

Use heavy paper for a stencil, originally uploaded by passitonplates.

You're going to love how easy it was to make this stencil.

1. I opened up a Word document and found a font I liked. I wanted to make sure it was heavy without a lot of fine detail so it would be easy to cut.

2. After typing the letter I wanted to stencil, I enlarged the font to the size I wanted to use, then test printed it on regular paper.

3. When I had the size just right, I put a sheet of card stock in my printer and printed the letter on it.

4. I couldn't find my exacto knife, so I put the paper on a kitchen cutting board, grabbed a sharp paring knife from the kitchen and traced over the letter outline with the point of the blade. (Is that cheating?)
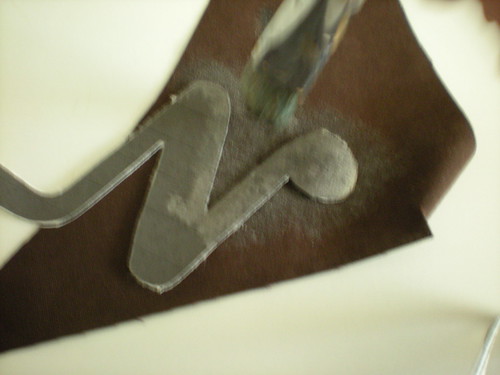

Testing the colors and technique, originally uploaded by passitonplates.

Now it's time to testing the colors and technique. I used the cut out N on a fabric scrap to make sure everything will turn out the way I see it in my head.
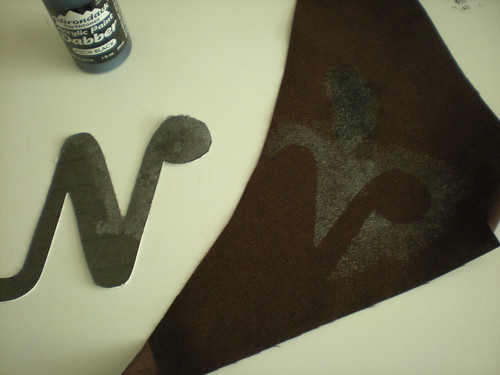

Subtle. That's perfect., originally uploaded by passitonplates.

Subtle. That's perfect.


Align the stencil and start dabbing and painting, originally uploaded by passitonplates.

Next I aligned the stencil and started dabbing and painting. This is just on the front piece. I didn't attach it to the back yet because it needed to lay flat while I painted it.
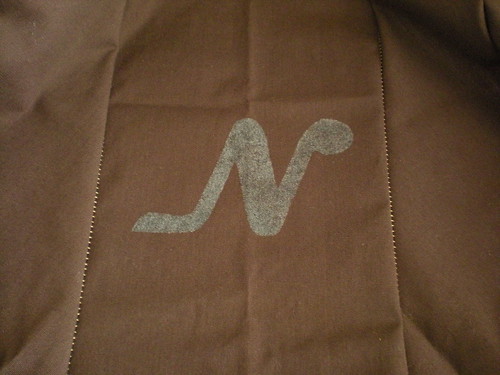

Stencilled "N", originally uploaded by passitonplates.

Here's the stencilled N.

Next, I sewed the back to the front, turned it right side out, fought to cram the cushion into the cover (quite a snug fit, which is what I wanted) and call dad to let him know it's ready. The tan stitching shows on all the seams, which looks tacky in the photo. When you look at it in person, the stitching actually adds to the charm and makes it look a little more rugged.

Dad loved it.

.

Did you like this post?
How about subscribing
in a reader or by email? It's quick and easy.
.

January 16, 2009

Our January Giveaway is coming up on Monday!

Do ya want some candy?


Come back on Monday and enter our New Years' Resolution Giveaway!
.

Did you like this post?
How about subscribing
in a reader or by email? It's quick and easy.
.


December 19, 2008

New Traditions


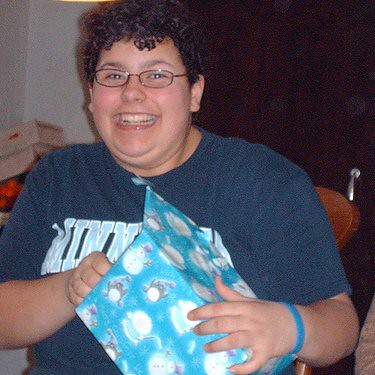
Giddy, originally uploaded by passitonplates.

When our family gets together to celebrate Christmas and open presents, we take turns wearing a Santa hat and handing out presents. We hand out one gift at a time and everyone watches while it's being opened. When the present is opened, that person puts on the hat and reaches under the tree to give away the next present.

A couple years ago Friedel (our "adopted" step mom, of sorts) started a new twist on that tradition when she suggested that each person should sing a Christmas song before opening their present.

We don't have a lot of brave singers in our family, but this has turned out to be a lot of fun, trying to think of something nobody has sung yet, or trying to come up with an obscure song that everyone has forgotten.

Has your family started any new Christmas traditions? Please comment here and share!

.

Did you like this post?
How about subscribing
in a reader or by email? It's quick and easy.
.

December 12, 2008

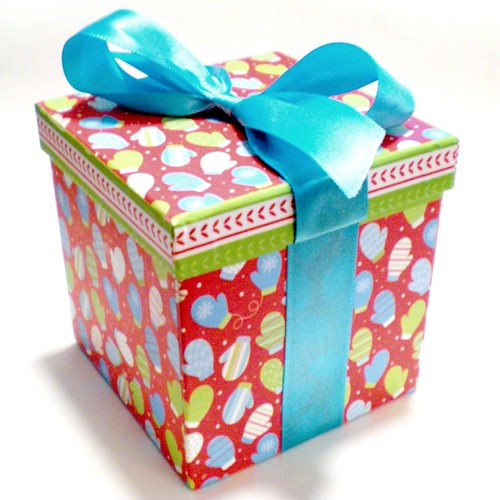
How to Dress Up a Gift Box


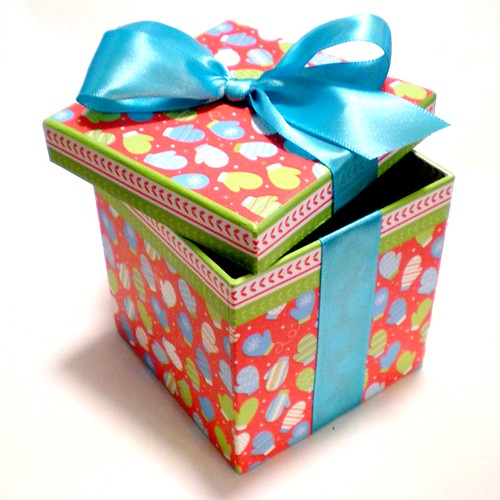
"Perma-Bow", originally uploaded by passitonplates.

I love pre-decorated gift boxes but sometimes they just need a little extra something. I also like putting collections of gifts (like gift basket kind of stuff) in the boxes and sometimes need to add to the box over a period of days and/or shopping trips. This makes it easy to gift wrap what I have so far and add to it as I create/shop.

Of course, this is only for gifts I'm taking to a friend's house or shipping out of state, because I think the temptation would be too much for certain family members at home who always eye the gifts under the tree and look for ways to sneak a peek.

This is super easy and I made (and photographed) this a couple days ago while I was having my morning coffee. And if I can make this with bleary eyes and less than a cup of coffee in my brain, you could do it too.

Materials needed:

Sturdy gift box with lid
Length of ribbon to coordinate with the box
Heavy-duty glue, such as hot glue or E-6000
Glue stick
Scissors

Note: You'll need enough ribbon to go around the box bottom + 4" and enough ribbon to go across the lid x 6. For example, if the box is 4" on all sides, you'll need a total of 16" of ribbon for the bottom of the box. If the lid is 4"x4" with a 1" lip, you'll need 24" of ribbon for the lid.


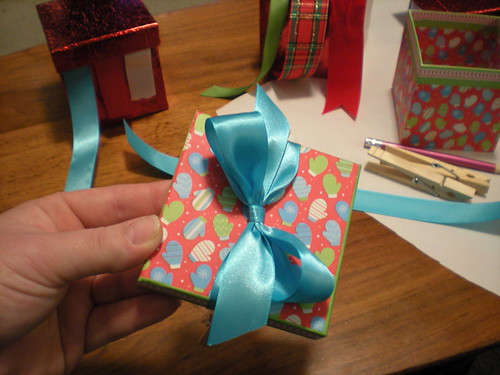
Tie a ribbon around the lid, originally uploaded by passitonplates.

To start, tie a length of ribbon around the lid, finishing with a bow and trimming the ends as necessary. Secure the bow with a dot of heavy duty glue in a hidden area.
When it looks perfect, turn the lid over.


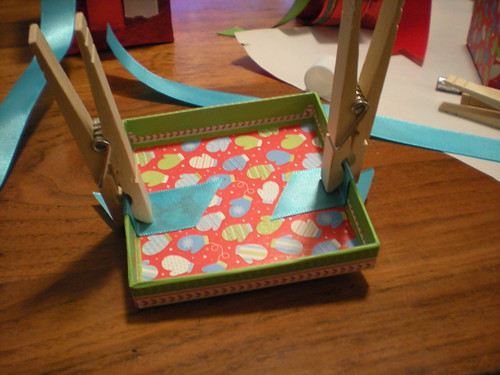
Cut, glue, and clamp, originally uploaded by passitonplates.

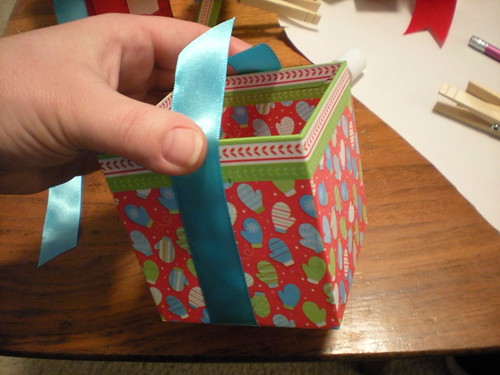
Cut the ribbon so you can form it to the lip on the lid. Apply a line of gluestick glue to the underside of the ribbon, starting at the bow on top, and ending at the cut ends. Use some sort of clip to hold it in place while it dries.


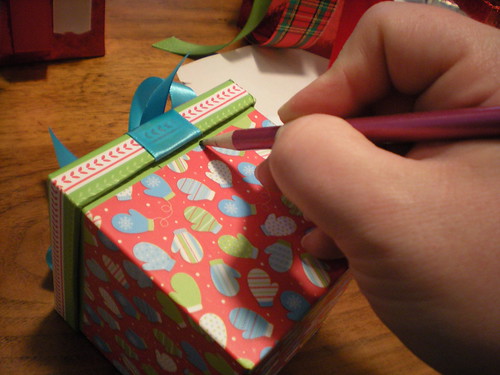
Mark the box, originally uploaded by passitonplates.

To make sure the ribbon on the box lines up with the ribbon on the lid, put the lid on the box and make little pencil marks as a guide.


Measure and cut the ribbon for the box.


Glue and clamp, originally uploaded by passitonplates.

Glue and clamp the ribbon to the box. Make sure the ribbon lines up with your pencil marks.


Let it sit until the glue dries.


Ta-dah! Dressed up gift box!


Did you like this post?
How about subscribing
in a reader or by email? It's quick and easy.
.

December 5, 2008

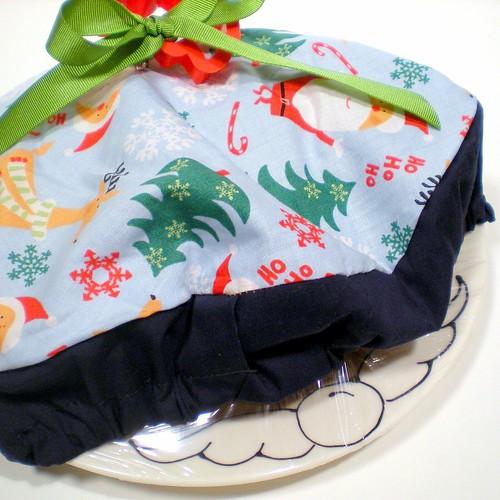
Have you seen our Christmassy PlateWraps?


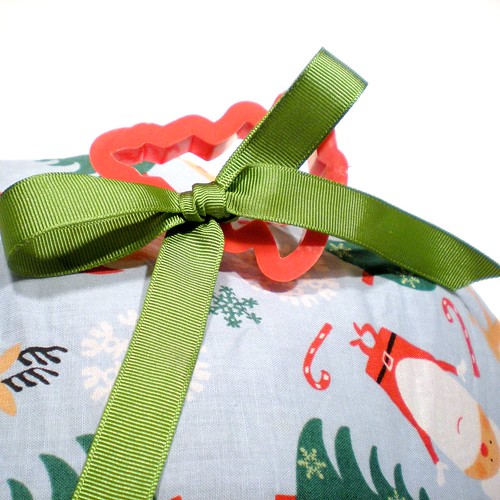
Cookie Cutter Tie-In, originally uploaded by passitonplates.


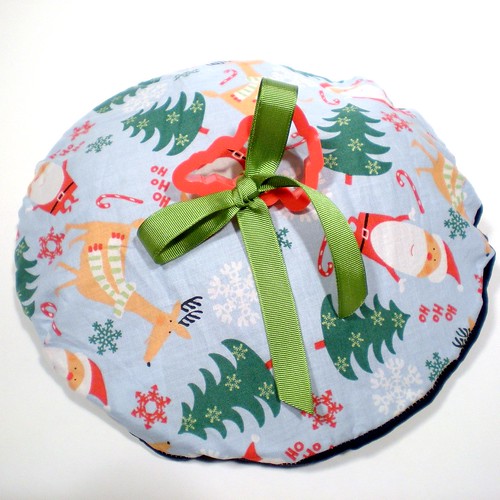
Happy Santa PlateWrap, originally uploaded by passitonplates.

Happy Santa PlateWrap, originally uploaded by passitonplates.

.

Did you like this post?
How about subscribing
in a reader or by email? It's quick and easy.
.

November 28, 2008

Boost Your Biz


boost your biz - badge, originally uploaded by passitonplates.

As you surf the internet, watch for this badge.

When you see it, click on it to visit another blog I write at www.PamHawk.com

There you'll find interesting, creative but practical, and very very inexpensive tips and tricks to hep you grow your own creative business.

If you use any tips, I'd love it if you would grab the badge for your sidebar to spread the word!
Thanks!


.

Did you like this post?
How about subscribing
in a reader or by email? It's quick and easy.
.

August 29, 2008

Where have Pass It On Plates traveled to?

Here's a little Friday FYI for ya.
As of today, Pass It On Plates are circulating in these states:

Hm. I wanted to show off this neat map I found because I thought it would be fun and easy to change as states are added. Turns out I had to go back to BigHugeLabs.com and make another map from scratch when I realized I had forgotten a state. What a pain in the butt.

Well ok, just think of it as a static map.

It could still come in handy. Could you use a map like this? What would you use it for?

.

.

July 25, 2008

I don't send thank you notes anymore...

I send Thank You plates.
With cookies.

Sometimes I feel guilty doing this because I get a Thank You note back for my Thank You plate.

It's a Catch-22.

July 18, 2008

Promotion Tip - Tell Etsy when you're mentioned

Over at Etsy, they have started an Etsy Press Club.
Jodie at Pretty Little Love Objects suggested letting Etsy know whenever you are mentioned in the press.

I checked into this and found a link to the new (as of January 2008) Etsy Press Club and also some info about how to let Etsy know when you're mentioned in the press.

.


.

July 11, 2008

You Rock!

You Rock! award
I'm still relatively new to blogging and professional crafting and I'm amazed at the new tricks I learn every day. I don't learn these things by reading the online help files, but by reading other blogs, checking out other artists and crafters, and observing how they do things.

Because I have found inspiration and have learned valuable techniques from these other artists and bloggers, it's time for me to share some long overdue thanks and kudos to those who have unknowingly helped me along the way.

You Rock!
(in no particular order)

Jessica at How about orange...
Stacy at Psilology
Laurie Beth Beggin at Laurie Beggin Glass Musings
Megan at Brassy Apple
Heather and Tiffany at The Secret is in the Sauce
Kim at Today's Creative Blog

Ladies, grab the award and pass it on to a handful of other people who have inspired you or taught you some valuable things... and let them know that they totally rock!

.

July 4, 2008

Mix-n-Match

Isn't this a pretty color combination?

When setting up the art show in Lincoln City, "Mr. Pass It On Plates" was helping to set up plates with treats. He asked what plates go with which PlateWraps and I said, you can just pick and choose. Whatever you think looks good is fine with me. This was one of his color selections.

...and the idea started...
Why not offer all Pass It On Plates as a Mix-n-Match?

Watch our website near the end of July when we unveil a new way to buy Pass It On Plates:
Mix-n-Match.
Pick your favorite plate color, decide which pen color will look the best on your plate, select your favorite PlateWrap, then choose the Pretty Little Doo Dad you like best.

We've got lots and lots of choices for you to mix and match your own combination and can't wait to see what ideas you come up with!

June 27, 2008

Garden planning


Surplus Zucchini, originally uploaded by passitonplates.

This summer as you tend you vegetable garden, don't become alarmed when you see that every zucchini plated is doing well. No worries at all about having so much zucchini you won't know what to do with it.

Just put an armful of these "almost-too-easy-to-grow" summer squash on a Pass It On Plate give it to your next door neighbor.

Let her worry about who to prepare all the extra zucchini!

Powered By Blogger