Showing posts with label Tutorials. Show all posts

May 22, 2009

Make your own Celebration Platter

This morning I grabbed a cup of coffee and sat down at the computer to browse on The Find when I came across this Celebration Platter:

The description from Exposures says, Our Celebration Platter is the perfect gift for any occasion that's cause for celebration. New baby. Graduation. Job promotion. Commemorate the moment with this high-gloss white ceramic platter. It's large enough for all of your friends and loved ones to chime in with a special message. Just sign the plate with pen (one pen included; additional available for quicker signing), and bake in the oven for warm wishes that last a lifetime.

Their platter is on sale today for $46.99 and the pen is $11.99. Exposures charges $6.50 shipping for up to two pens. Yep, both of our plates use the same kind of food safe ceramic paint pen!

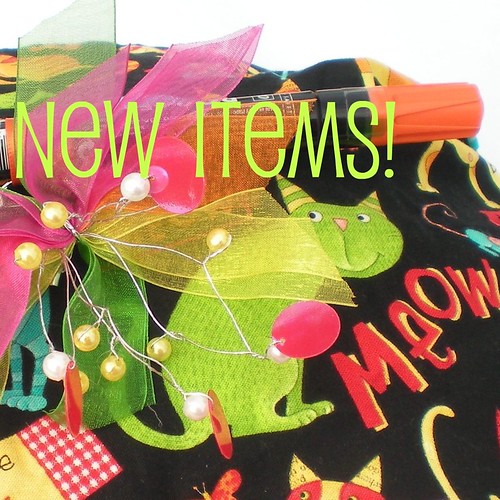
If you're like me - too thrifty and crafty to spend that much money on something that you could create yourself, you're probably thinking about how to make your own. And with all due respect to Exposures, our paint pens sell for less.

We currently sell them on Etsy for $10 each and shipping is free for up to 6 pens.

Here's how to make your own:

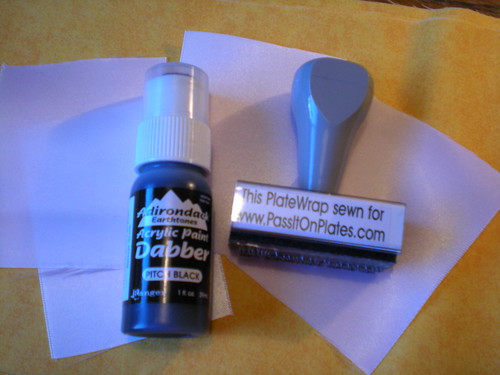
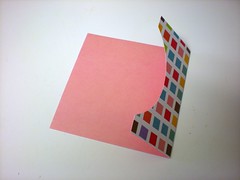
1. Get some of our pens in a couple of different colors. You could buy your own plate or platter at Target or another store for about $15-20. Just make sure it's ceramic or stoneware. Plastic will melt in the oven when you make the paint permanent.

2. Make sure your platter is clean - the paint pen is water based and surface oils on the plate will resist the paint. Make sure all your party guests have clean hands, too, so oily fingerprints don't cause the same problem.

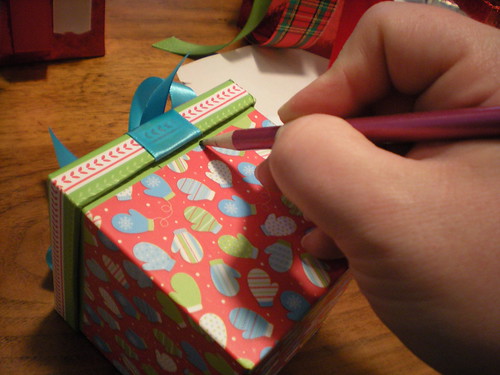
3. Ask everyone at the party to use the pen to write something on the ceramic plate or platter.

4. When everyone has signed the platter, bake it in an oven for 30 minutes to make it permanent. (Instructions are written on the pen.) And it's dishwasher safe after you bake it, although I recommend hand washing all handmade items.

5. You could have everyone sign the platter at the beginning of the party and bake it during the party. If you're sneaky, you could get away with this without the guest of honor knowing what you're up to. The plate will be cooled and completely finished before the party's over and your gift will be the hit of the party and the guest of honor keeps your platter as a memento of the occasion.

This is a very personal, sentimental gift idea. Got a wedding or wedding shower, anniversary, or birthday coming up?

Wow, what a perfect gift!


PS: How is this platter different from a Pass It On Plate? Our plates have a tracking number on the back and they're intended to travel from person to person. We include the pen so each person can write something on the plate as it travels - just to add to the fun.

February 5, 2009

Sweet Valentine's Picture Frame

Sweet Valentine's Picture Frame
I made this picture frame as a gift for my Dad one year for Valentines' Day. The frame was a purple wooden frame on clearance for $.50 at Target and I couldn't pass it up. I liked the shape.

I sanded off some of the purple paint, then painted it with red craft paint, rubbing off the excess with a rag. A second coat of red, then a coat of gold craft paint on top and that was done.

Next, I took some lace, ricrac, and four buttons to finish decorating. I'm impatient, so it's all held on thanks to my trusty glue gun.

If the picture frame looks dusty, it's because Dad's now doind some serious downsizing and he gave it back. I love this cute picture of me and baby Rachel on her (and my hubby Frank's) first ever visit to Oregon. Rachel is 13 years old now. (See - that does explain the dust, doesn't it?)

...Huh. I still wear that coat...


Picture frame side detail, originally uploaded by passitonplates.

Picture frame side detail
Here's a close up of the ricrac that runs around the edge of the frame.


Back of the frame, originally uploaded by passitonplates.

On the back, I took a paint pen (ok well actually it was Tulip paint, for t-shirts) and wrote on the back of the picture frame.

Like I said earlier, never mind the dust.

+++++++++++++

Don't forget to enter! Our February Giveaway runs from Feb 1-7, 2009
Pass It On Plates Giveaway Feb 1-7


.
Did you like this post?
How about subscribing
in a reader or by email? It's quick and easy.
.

December 12, 2008

How to Dress Up a Gift Box


"Perma-Bow", originally uploaded by passitonplates.

I love pre-decorated gift boxes but sometimes they just need a little extra something. I also like putting collections of gifts (like gift basket kind of stuff) in the boxes and sometimes need to add to the box over a period of days and/or shopping trips. This makes it easy to gift wrap what I have so far and add to it as I create/shop.

Of course, this is only for gifts I'm taking to a friend's house or shipping out of state, because I think the temptation would be too much for certain family members at home who always eye the gifts under the tree and look for ways to sneak a peek.

This is super easy and I made (and photographed) this a couple days ago while I was having my morning coffee. And if I can make this with bleary eyes and less than a cup of coffee in my brain, you could do it too.

Materials needed:

Sturdy gift box with lid
Length of ribbon to coordinate with the box
Heavy-duty glue, such as hot glue or E-6000
Glue stick
Scissors

Note: You'll need enough ribbon to go around the box bottom + 4" and enough ribbon to go across the lid x 6. For example, if the box is 4" on all sides, you'll need a total of 16" of ribbon for the bottom of the box. If the lid is 4"x4" with a 1" lip, you'll need 24" of ribbon for the lid.


Tie a ribbon around the lid, originally uploaded by passitonplates.

To start, tie a length of ribbon around the lid, finishing with a bow and trimming the ends as necessary. Secure the bow with a dot of heavy duty glue in a hidden area.
When it looks perfect, turn the lid over.


Cut, glue, and clamp, originally uploaded by passitonplates.

Cut the ribbon so you can form it to the lip on the lid. Apply a line of gluestick glue to the underside of the ribbon, starting at the bow on top, and ending at the cut ends. Use some sort of clip to hold it in place while it dries.


Mark the box, originally uploaded by passitonplates.

To make sure the ribbon on the box lines up with the ribbon on the lid, put the lid on the box and make little pencil marks as a guide.


Measure and cut the ribbon for the box.


Glue and clamp, originally uploaded by passitonplates.

Glue and clamp the ribbon to the box. Make sure the ribbon lines up with your pencil marks.


Let it sit until the glue dries.


Ta-dah! Dressed up gift box!


Did you like this post?
How about subscribing
in a reader or by email? It's quick and easy.
.

November 10, 2008

How to put your own videos into your blog

Last week I posted a brief video of my car into my other blog to show my friend Amador how easy it is to post videos online.

Today I posted a quick how-to so you can post your own videos on your blog.

It's a lot easier than most people think.
Like I said last week in the other blog, I don't even own a video camera.
Please go check it out. Later this week I'm going to be talking about some incredible ideas that you can use your videos for... including increasing your Etsy sales. You're gonna love these easy ideas. I can't wait to show you.

Did you like this post?
How about subscribing
in a reader or by email? It's quick and easy.
.

November 1, 2008

Hand made sew-in labels

More and more people are talking about making their own Christmas gifts this year. That's exciting to me, because I've always liked doing that and the gifts were always well-received. This attitude shift could be a really good, meaningful Christmas for a lot of people.
That in mind, I wanted to share a handy tip you could use if you are planning to sew anything and want a nice looking label for your handcrafted item.
We hand-wrote our website on the inside of the band on each PlateWrap back when PIOP started. This worked fine for a while, until I realized it was time to get a better sew-in label. I was getting ready for a craft show and needed something really fast. (And really economical, since I had already spent a lot of my budget on plates and fabric.)
No time to design and order machine-printed labels, I stopped in to see Lisa at Stampin' Cat, a local stamping store, to see if she could help. She smiled and pointed me to a dabber bottle full of water-based paint that is permanent on fabric.

I used this dabber paint with a silicone stamp I'd had made earlier. The labels were 7" long strips cut from a spool of 3" wide white satin ribbon that I picked up at Michael's for about $4.

To make the labels, I just dabbed the paint onto an index card, then tapped the stamp into it. I practiced stamping on the index card to get a feel for how much paint to load onto the stamp so I didn't get blobby results on the ribbon.

Ok, it's a little blobby, but readable. And instead of being all anal retentive and picky about the results I reminded myself that this is a handcrafted item and small variations are part of the label's character and should be considered a natural part of the PlateWrap.

Or something like that. Basically I told myself,

"Self, you have got to relax and let it be."

Nifty, huh?


Silicone rubber stamp, originally uploaded by passitonplates.

Oh darn it, I didn't think to take pictures of the labels in the PlateWraps.

To finish the labels, I folded each one in half around the band that encircles the back side of each PlateWrap, and sewed them in place. I use a serger, so that binds the raw edges on the labels. It looks clean and nice.

If you get a Pass It On Plate or see a PlateWrap floating around out there, check and see if there's a nice wide satin ribbon label sewn inside. (Not all PlateWraps have these.)


.

Did you like this post?
How about subscribing
in a reader or by email? It's quick and easy.
.

September 10, 2008

One more little HTML lesson tutorial

You know how to make bold and italic text, right?
Those are just a quick little <b>before and a</b> after for bold, and a little <i>before and a</i> after for italic.

How about a strike out? My clever daughter just showed this one to me.
Just type in this text: <strike>strike</strike>

Want to see it in use?
Sure you do. Besides, it'll make you feel really good about your well behaved kids.

While typing this, my exuberant 12 year old nearly 13 year old (and old enough to know better) was sitting on the back of the couch, reading over my shoulder as I typed. Something brushed my right ear and there was a huge WHUMP! and a shriek as she fell over backwards, landing on the cushion of the couch.

Turns out my darling daring daughter nearly kicked me in the head as she lost her balance. I tried to scold her and she kept whooping and yelling, "That was fun!!"

She agreed to wait until I'm done before she tries again. She needs a ride to a friend's house later this evening.

September 9, 2008

Spiffied up CD jewel case liners


Here is a nifty CD case insert
Originally uploaded by passitonplates

Boring and Bland are my two enemies. Their evil plan is to make life as boring as possible, and we just can't have that now, can we?

Whenever possible I try to foil their evil plan... with as little time and effort as necessary.

Maybe I'm cheap and lazy. No, don't try to be nice. I admit it.
I am cheap and lazy.
With all kinds of fabulous stuff that I made myself. (wink!)


And it's fun on the inside, too
Originally uploaded by passitonplates

See?
Fun fun fun on both sides of the insert.


It's just a single sheet of scrapbooking paper
Originally uploaded by passitonplates

Yeah, I'm thinking those "design your own CD case insert" programs are awful and my printer is not that great. This is faster, easier, better-looking, and I can do it when it's someone else's turn on the home computer.

See? Tell your mother it's not a such bad thing to be lazy. And when you admit to her that you're cheap, be sure to point out you mean financially. Not . . . the other kind of cheap.


The paper has designs on both sides
Originally uploaded by passitonplates

This was so easy and looked so great that I made a bunch and then scoured the house looking for more vacant CD cases to spiffy up.
Ok, ready? Here's how to make yours:

1. Select a sheet of two-sided scrap booking paper that you want to use for this project. Decide which side will be shown when the case is closed and which side will be shown when the case is open.

2. Fold the sheet of paper, making sure that the paper on at least one side of the fold is as large (or larger than) the CD jewel case.

3. Align an existing CD insert with the folded edge of your scrap booking paper. Using the CD insert as your template, and a really light touch with your pencil, trace around the remaining 3 sides of the CD insert.

4. Cut along your traced line.

5. Embellish as desired. I traced the shape of the CD on the front and cut it out.

6. Slide into place.

Ta dah!
Now poke through the house looking for more boring CD jewel cases to spiffy up.

You know you want to.

September 5, 2008

Another
Quick-n-Easy
HTML
Tutorial

Check it out - line breaks in the blog title!

Want in on the secret? It's four little characters of html code that indicates a line break. It's so easy.

Here's the code: <br>
The BR means "Break"

When I typed in the title to this blog post, it looked like this:
Another<br>Quick-n-Easy<br>HTML<br>Tutorial

Easy, peasy.
Now off you go, to let all hell <br> loose with your use of HTML.

September 3, 2008

Keeping everyone on the same page
...an easy HTML tutorial

Have you noticed this? When you are visiting someone's blog or website and you click on a link, sometimes the link opens in a new window (or tab) and sometimes you leave the blog completely and jump over to the new link.

Staying or jumping has to do with how the html is written on the blog post or website.

Sometimes this is a good thing, jumping from blog to blog, and other times it's annoying because what you were initially reading was very interesting and now you have to hit the back button to figure out where you were before the link sent you shooting off to someone else's blog.

As for me, I like to keep my readers here, partly for their convenience, and (from a business standpoint,) partly so my brand is not forgotten too quickly. Would you like to do the same?

Without any foreign language instruction, here's how.
Denise, I'm going to use your blog URL as the example.
I hope that's ok.
Thanks!

1. Start a new blog post in a new window or tab on your browser so you can keep your eye on this tutorial.

2. Type in the name of the site you want to experiment with, then attach a link to it. Here's the example:
Denise Clenney's Changing Designs

3. Now flip over to your Edit Html tab on your blog post. Take a look at the code for what you just did. It should look like this: <a href="http://changingdesigns.blogspot.com/">Denise Clenney's Changing Designs>

4. If you are extremely unfamiliar with html, I'll explain the different parts here, and please pardon my lack of technical language. I may be geeky but I am not a geek.

a href= This tells the browser that this is a link.

"http://changingdesigns.blogspot.com/" Tells the browser where to go.

< > These brackets tell the browser that this is where the code is, and not to make it look like text.

Denise Clenney's Changing Designs This is the text link you see on the page. Sometimes it's underlined, sometimes it's a different color.

Since the first bracket started with an "a" this "/a" tells the browser that's the end and closes the code.

5. If you publish the blog post and click on the link, you will jump directly to Denise's blog. So let's go back to edit the blog post and modify the link you just put in.

6. Go to the Edit Html tab again and enter some extra code to tell the browser to open a new window or browser tab when this link is clicked. Here's the code again:
<a href="http://changingdesigns.blogspot.com/">Denise Clenney's Changing Designs>

7. In the spot between the end quote
" and the end bracket > you'll need to enter the following code: target="_blank"
(There is a space before the word target.)

8. The link now looks like this:
<a href="http://changingdesigns.blogspot.com/" target="_blank">Denise Clenney's Changing Designs>

Now for those of you who are anal retentive about this kind of stuff, there's more.
(You can't see me, but I'm sitting at the computer sheepishly raising my hand.)


If you feel the need to go back into any older posts, (and try to restrain yourself PAM HAWK,) you can do a quick fix on all those pesky links that could potentially take your readers away forever.

1. Open any blog post you can't resist the urge to fix and go to the
Edit Html tab.

2. If you are using a PC, hold down the Ctrl key and tap the F key to open a Find dialog box. (If you have a Mac, sorry - I don't know how you initiate a search.)

3. In the search box, enter
a href="
Yes, you can copy and paste from this blog post.

4. Now highlight and copy this code
target="_blank"
Remember, there is a space in front of the word target.

5. Search the entire bit of blog post html, and every time you find a link, paste in the code. Just position your cursor between the "> and hold down Ctrl and V to paste.

6. Click search click search click search your way through the blog post until it's flawless. Or until you realize you really need to stop and do something more productive, *ahem* Pam.

August 20, 2008

Six steps to designing a Project Wonderful ad

Now that you have some info on buying and selling advertising with Project Wonderful, what ad will you use to advertise your site or hot new product? Today I'll show you how to make a great-looking Project Wonderful ad without any special computer programs.

You can create one in just 6 easy steps using your Flickr account.

1. Look at Project Wonderful and decide what ad size you want to make. This quick tutorial is for the 125x125 square ad.

2. Log into your Flickr account and choose an image. Click on it.
(I made an ad based on the image used for the giveaway blog post so they matched.)


2. Click Edit. Flickr's editing program, Picnik, will open. Be patient, it takes a moment. When it opens, you will see two tabs. One is Edit and the other is Create. You will start out in the Edit tab.


3. Crop your photo. If you are making a square ad, select the square from the drop down box. (These screenshots are from an upcoming blog post... You'll just have to bookmark this blog or subscribe so you don't miss my next Flickr tutorial.)


4. Resize your photo to the Project Wonderful ad size you want to make. In my case, I typed in 125 and Picnik did the rest. When the shape and size are to your liking, click OK.

5. Now for the fun part. Click the tab named Create. Type in your advertising word or words and play with the color, font, layout, and other settings until it's perfect.

..........

6. Save your work. Before you complete the save process, let Picnik know if you want to save a new copy or replace the original. I recommend always saving a new copy so you can use the original for other ads or projects. Save this image to a location on your computer so you can easily upload it to Project Wonderful.

Ta dah! Quick and easy.
And fantastic-looking.

If/when you make one, comment here with a link to your ad. I'd love to see how it turned out. Plus, if you send me a link to your ad, I'll write up a post to be published next week to show off all the ads. Hey, that's free advertising for you.

Ok, also... Come back tomorrow to find out who won the big giveaway!

August 9, 2008

Blue Flame Pillow


Blue Flame Pillow, originally uploaded by passitonplates.

I made a pair of pyramid pillows for Rachel a couple years ago. (This is one of the pair.)
It was so easy to do.

Materials:
One piece of fabric, twice as long as it is wide
Polyfoam pillow stuffing
Coordinating thread

Instructions:
1. Fold the fabric in half, right sides together , and matching the short ends. (It should look like a square.)
2. Sew along the short ends to make a tube.
3. Sew along one of the other open ends so the square is open on only one of the four sides.
4. Lay out the square with the open side at the top, the folded side on your right, and the side seam on your left.
5. Measure along the raw edge of the open side and mark the center point.
6. Flip the square over and repeat step 5.
7. Pinch one of your marks between the fingers on your right hand, pinch the other mark between the fingers on your left hand, and pull taut. The side seam should now be at the center point on the open end. Pin.
8. Sew along this edge to close, leaving about 6" open.
9. Turn right side out, stuff to desired softness, tuck in the raw edges, and topstitch to close.

July 26, 2008

Bottlecap Magnets

Maybe it's stalling or procrastinating.


Last Thursday I was making a bunch of Pretty Little Doo Dads and was busy making a bazillion hot pink bows. The glue gun was out and I became distracted by some bottle caps on the fridge.

Digging through a drawer, I found a handful of other bottle caps and a package of round magnets. Here is what I spent the next half hour making:

bottlecap magnets, originally uploaded by passitonplates.
I sent this package to a friend half way across the country. She said she likes beer, and she loves the magnets. (Hey Michelle, can you send me some Corona bottlecaps?)

Would you like to make some? Easy peasy.

1. Plug in your glue gun to heat it up.

2. While waiting for the glue to heat up, drink a bottle of pop for the cap. Or you can have a beer. Just make sure that if the cap is not the screw-off type it doesn't get warped by the bottle opener. Have you been collecting bottle caps for such a project? Go find em. We'll wait for you.

3. Pump about 3 or 4 triggers of glue into the bottle cap, and let cool until just barely firm. This will elevate the surface the magnet sits on so the magnet will be able to contact the surface you'll stick it to...
Like the fridge, as it holds up your grocery list...
...the list that reminds you to buy more pop. Or beer.

4. Squeeze a blob of glue to the magnet and carefully place it in the center of the cap. Be careful not to burn yourself as you hold it in the center. Use a toothpick if you're chicken. The magnet will want to slide to the rim and stick there. The rim is metal, after all. Push on the magnet, if necessary, to level it out.

5. When cool, stick it on the fridge. Or wherever. I stuck three to a card and sent it to my friend.

.

July 5, 2008

Laundry tags


What's the laundry situation like at your house? Do you have baskets of dirty and clean sitting on the floor, waiting for a little action? Well, I hate to admit it, but we do. We're all so darned busy that sometimes laundry has to wait.

Problem is, sometimes I grab a load and start folding it only to realize that the top half is clean and the bottom half is dirty. Eww. Guess someone emptied the dryer into a basket of what they thought was clean laundry.

While waiting for inspiration to hit before digging into a big project (with a deadline, I might add) I made up some laundry tags. The glue gun was already heated up, so it was quick and easy.


Laundry tag back side, originally uploaded by passitonplates.

There were several wooden oval discs in a craft drawer, so I placed some self-stick scrapbooking paper on one, edged it with a black sharpie, then hand lettered the word "Dirty" on the disc. A line of hot glue on a clothes pin on the backside and Voila! Something I could clip to the top sock on a basket of dirties so there's no question what's in the basket.

Dirty laundry tag, originally uploaded by passitonplates.

When the mood strikes, I think I'll make up some Clean tags in a different color. Maybe tagging the laundry will help get it taken care of faster. I can't tell you how many times the hubs has pointed to a basket of something and asked, "Clean or dirty?" Maybe if he knows what's clean he'd be more apt to fold it and put it away. ...Nah, who am I kidding?

Anyway, the tags have helped me see what's what. Wonder what else could benefit from these kinds of tags? Hmmmm... Maybe I could tag bath towels when we have overnight guests. (We only have one bathroom with one towel bar in our tiny apartment.)

March 9, 2008

Cord Keepers


Another cheap-easy-fast project!

This is another craft project that gets the creative juices going before tackling bigger projects. Plus, it uses up fabric scraps too small for most projects but too nice to throw out.

Plus (additional sales pitch to convince naysayers - ummm, hubby & mom - how important this project is) it keeps electrical cords neat and compact.

-Protect your work surface because this project is messy and gluey. A still-folded paper grocery bag works fine.
-Start with a cardboard tube. Toilet paper tubes work great because of the length, but you can use wrapping paper tubes or paper towel tubes, too.
-Grab the white glue and a plastic spoon.
-You'll need an 8"x8" square of fabric (no linen because it dries too scratchy)
-Get a piece of waxed paper ready

1. Lay out the fabric on a protected surface, right side down.
2. Slather with white glue and spread it out to all edges with the plastic spoon.
3. Lay the tube at one end of the fabric and roll up.
4. Tuck the fabric into the ends of the tube. The wet fabric will fight you. Fight back with the spoon. Be patient.
5. Smooth out the fabric and rub in any areas that are still heavily glued.
6. Stand up the wet gluey tube on the waxed paper and let dry overnight.
Powered By Blogger