March 28, 2008

Meghan advertises on a plate


Did you know you can advertise on a Pass It On Plate? When you sign your name to a plate, add your business name or website. When you leave your comment in your plate's online diary, go ahead and include your URL, as well.

As the plate travels, your business name and website are shared among a network of friends. Think if it like a traveling business card... with food on it. Yum!
Meghan says that she passed this plate to a long-time client who gave it to a co-worker. The co-worker called Meghan the next day and made an appointment to get her hair done. The plate is still traveling, so Meghan is curious to see if she gains any more new clients from this single plate.

March 26, 2008

Sofa-Change Decorating #2: Foggy Lens


This is one of my favorite paintings. When she was in the 3rd grade, Rachel asked me to buy her a $2 canvas because she wanted to paint. She took it outside to the picnic table with a box of paint and brushes and went to work.

Within a short time, she had created this. She calls it a mess and doesn't like it, but there's just something about it that I love. It hangs on my bedroom wall so I can look at it every day.

Cost? We already had the paint, and the canvas was $2.

Oh. I had the feed the starving artist when she was done. A PB&J sandwich and a glass of milk set me back an additional 35 cents.

March 20, 2008

My light "table"


I tried making a light box out of a cardboard box with windows cut out on the sides and a white garbage bag taped over the window.

Too dark, too big, no place to store it.

Cruising around the internet I saw a guy had made one with PVC pipe and other supplies from his local hardware store. His contraption looked a lot like a table and the little light bulb screwed into my brain suddenly lit up. I ran around gathering and buying the supplies I needed and went to work.

Here's my new lightbox... er, table.
It's a card table laying on its side. I draped a white twin sheet over the legs and shined three utility lamps through the sheet. Each light bulb in these lamps is 60 watts. I think I'd prefer a brighter wattage because my pictures still seem a little dark. I laid my fabric cutting board across the bottom for a good work surface.

My cost:
$3 for the sheet
$6 for each lamp x 3 = $18
$1.88 for a 4-pack of 60-watt bulbs
Grand total: Less than $23 for something

March 18, 2008

Flat Jack's Adventures in Oregon

A couple weeks ago, the talented stained glass artist Laurie Beggin had a post on her blog asking for 
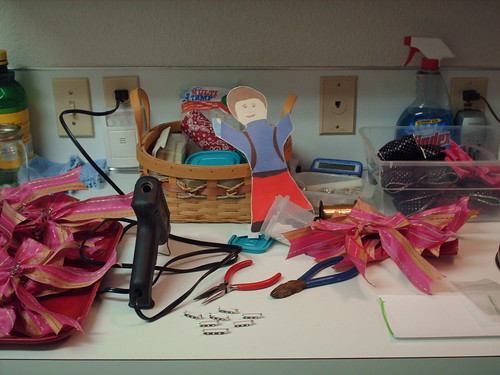
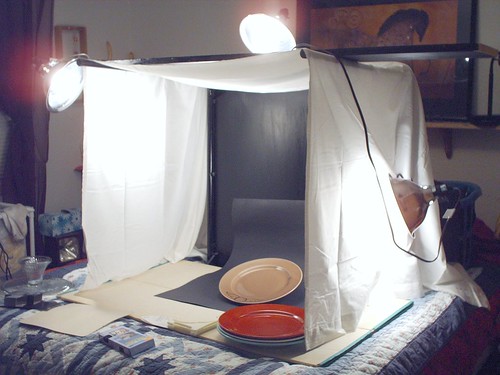
help with her friend Flat Jack. Jack went all the way out to Oregon to spend two weeks visiting with Pam, who makes traveling plates. Here is a picture of Jack in Pam's studio. He had a great time helping Pam make more Pass It On Plates. Instead of staying in a hotel, he stayed at her home in a special guest room (ok, a magnet held him to the fridge so he wouldn't get lost or hurt.)

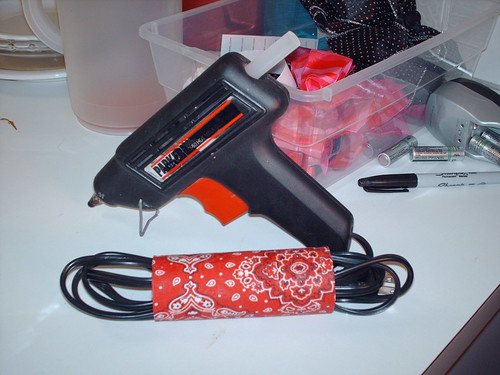
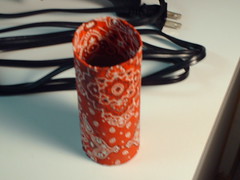
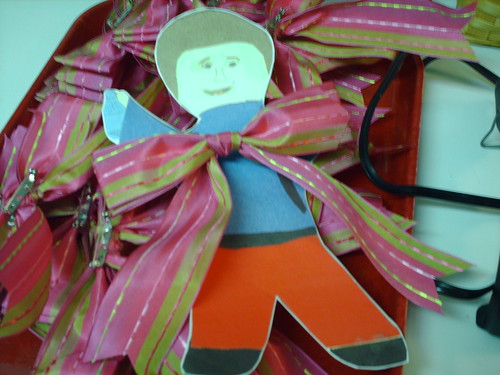
This week Pam was working on making more Pretty Little Doo Dads. These aren't pictured on Etsy or on Pam's website yet, and so Jack felt really special to be the first one to see the new bows. He helped tie and glue and really got tied up in his work.


Since Pam's husband Frank is Deaf, they use Sign Language at home all the time. Flat Jack wanted to know how to say a few things to Frank. As you can see in the previous pictures, Jack was constantly holding a blue water bottle in one hand (at least we think he had water in that bottle) and he was missing the other hand. Just like how our mothers told us "Hearies" that it's not polite to talk with our mouths full, in Sign Language it's not polite to talk with your hands full. Jack could not let go of the water bottle without hurting his only hand, so he was excused from that rule, but some words were impossible for him to learn. He even joked that his missing hand made him "mumble" in Sign Language.

Here is Pam teaching Jack how to say Thank You.


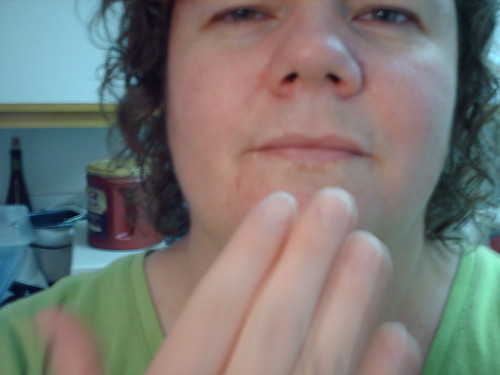
You can do it too. Just touch your hand (fingers together) to your chin just under your lower lip, then pull your hand straight out, away from your face.


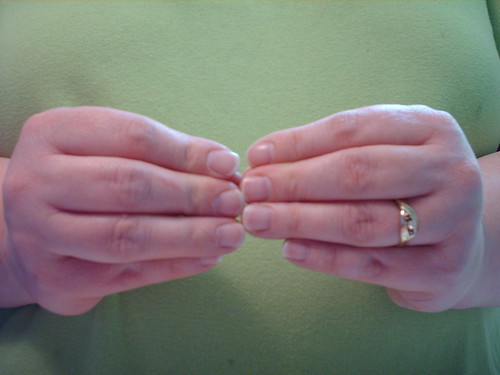
This is how Jack learned to say More, by touching your fingers to your thumb on each hand, then touching all your fingertips together.


and here is the sign for Please.


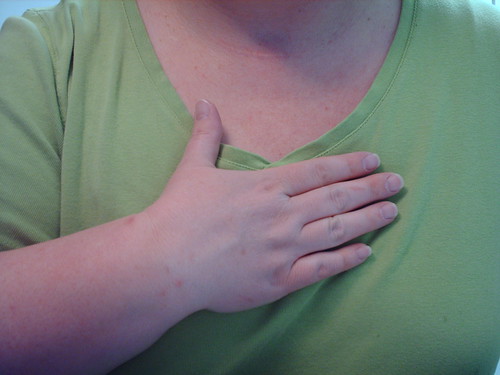
Rub your open hand (fingers together) in circles over your heart.


They have a dog named Caesar, and Jack liked to pet the dog. To call the dog, Pam taught Jack the sign for Dog. Slap your thigh a few times.


Jack looked pretty silly bending over like that and he started laughing. Pam used sign language to call him Funny.

Jack said he was funny too.

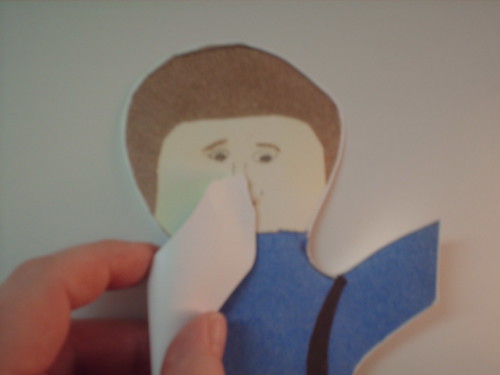
If you want to sign the word for funny, just put your pointer and middle fingers together on the tip of your nose and rub downward two or three times.

Jack thought it was really funny when Pam told him that since she and Frank are originally from Minnesota, Deaf people in Oregon think some of their Sign Language words are funny. They say that Frank has a "Minnesota accent." In fact, if you already know some sign language some of these words might look funny to you.

March 15, 2008

Name That PlateWrap

I'm a new fabric that is being made into 30 PlateWraps.
The problem is, I'm having an identity crisis. I don't know what my name is.


Here's a close up of some of my flowers. I was chosen for my bold, bright colors and because I look like fun, happy gift wrap.


To name this bright floral, we've decided to let you name it!

Can you think of a name for this fabric? Post your ideas in Comments (below) and we'll set up all the name ideas in a poll. The most popular name will be used and whoever comes up with the most popular name will (obviously) get some recognition, linky love, and more recognition.

1. We'll announce the most popular name in this blog along with a link to your website/online store/URL in our blog sidebar.

2. When this particular PlateWrap sells, a link to this blog article will be included on the online diary of every plate traveling with this PlateWrap. (See Plate #200709080005.)

3. We sew tags into every PlateWrap, naming the seamstress who made it. These PlateWraps will also carry a special fabric tag that says who named this PlateWrap fabric. If you like, we'll even include your website on the tag.

Don't have a website or blog that we can promote? That's ok - we'll still mention you in this blog and in the Plate Diaries of plates sold with this PlateWrap. You can have your name/nickname written on a special tag sewn into every one of these PlateWraps.

Post your ideas through March 15, 2008.
Feel free to post as many names as you can think of.
The names will be put in a poll on this blog, on March 16 and you can vote for your favorite until March 31, 2008.


If there's more than one really popular name, we're going to print out the names, take them down to the local Starbucks, and see what the local buzzed-on-java crowd thinks.


Can't wait to see what you come up with!

March 12, 2008

I'm #2! (and 3, 5, 6, 7, and 9)

Oh the joys of nerdy fun.
I periodically Google myself to see how my name ranks in the great Googleverse. In past Googles of my name I discovered there are other Pam Hawks around the US. Their careers range from real estate and accounting to dentistry. My first name Google put me near the bottom of page three.

Since taking Pass It On Plates online my name has moved up in rank. Today I was (nerdily) excited to see I'm #2. Not only that, but I take up seven of the top ten spots on page one.

Of course, I realize this may change tomorrow, but for today I'm happy with this. My goal, of course, is to be #1.

Googling Pass It On Plates (no quotes) has me in spot #12 on page two. Today, anyway. That's moving up, too, but not as quickly. My goal for that is to be #1, as well.

Have you Googled your name? How close to #1 are you today? Have you seen your rank increase over time as you continue blogging? How about your blog name?

Did you know that posting your comments with your name/URL will help you move up the ranks in search engines? If you did, good for you! If you didn't, here's more info about how commenting on other blogs helps your search engine rank.

March 11, 2008

Sofa-Change Decorating #1: Red Poppies

I've been poking around other blogs and have been inspired by things people have made for themselves to enjoy at home. I love Brassy Apple's desk and wish I had more color and personality pumped into my tiny, cramped apartment. Our last two houses in Minnesota were full of style and personality and COLOR and I only wish I could paint a wall or two. Terra cotta or dark apple red would make me happy. Or charcoal grey.

Looking around to decide where to start, I came to realize that I have some pretty neat creations of my own that make our home uniquely "us." Introducing a new topic called: Sofa-Change Decorating. (Because I'm extremely thrifty when it comes to decorating, and most of my projects can be made with cash found in the sofa. And laundry machine... And car cup holder...)

The first thing I'd like to share is a picture we have in the bathroom.
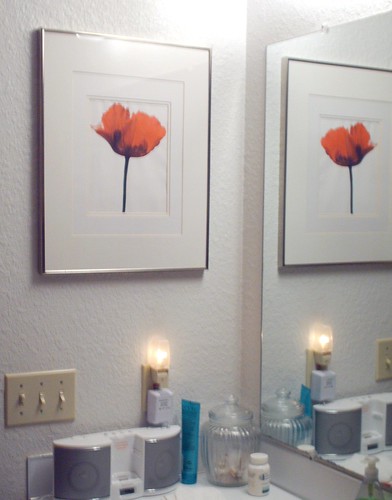
When we remodeled our first house, about 8 years ago, I needed some red art for the bathroom, and I needed it quick. It also had to be ultra cheap. (For those of you who know me, you know I can make some pretty darn good looking art for a pretty darn low price.)

Enter clip art. Yes, this red poppy is clip art.

I printed it out, framed it in a collection of mats that fit in a silver frame I had in the attic, and put it up on the wall. Prefect.

Now in our tiny apartment, we still have the red thing going on in the bathroom, so the red poppy is still up on the wall.

Design-wise, it helps bring the red color around the room. You can't see it, but there is a red geometric shower curtain on the opposite wall. We also have red bath towels on a shelf opposite the mirror.

Mood-wise, it makes me happy to see this bold but simple statement every time I wash my hands or brush my teeth. And it only cost me about $3.
.

March 9, 2008

Cord Keepers


Another cheap-easy-fast project!

This is another craft project that gets the creative juices going before tackling bigger projects. Plus, it uses up fabric scraps too small for most projects but too nice to throw out.

Plus (additional sales pitch to convince naysayers - ummm, hubby & mom - how important this project is) it keeps electrical cords neat and compact.

-Protect your work surface because this project is messy and gluey. A still-folded paper grocery bag works fine.
-Start with a cardboard tube. Toilet paper tubes work great because of the length, but you can use wrapping paper tubes or paper towel tubes, too.
-Grab the white glue and a plastic spoon.
-You'll need an 8"x8" square of fabric (no linen because it dries too scratchy)
-Get a piece of waxed paper ready

1. Lay out the fabric on a protected surface, right side down.
2. Slather with white glue and spread it out to all edges with the plastic spoon.
3. Lay the tube at one end of the fabric and roll up.
4. Tuck the fabric into the ends of the tube. The wet fabric will fight you. Fight back with the spoon. Be patient.
5. Smooth out the fabric and rub in any areas that are still heavily glued.
6. Stand up the wet gluey tube on the waxed paper and let dry overnight.

March 8, 2008

Back to sewing again

The old serger has been at the sewing machine spa for a week, getting a massage (tune-up) and a mud bath (totally cleaned up, inside and out.) She was returned to me in a new outfit with cute shoes (ok, the outfit was a plastic bag but the new shoes was a new foot!) She also had two shiny perfect needles properly installed, which is what sent her to the spa in the first place.

The trouble started when a needle broke. Darn that purple swirly fabric. Thinking I was in a hurry, I deftly swapped out the broken needle for a new one. Yah, the old serger needle was swapped out for a new sewing machine needle. Did you know those are two completely different types of needles? Neither did I. (I know that now. ) After putting the new needle in place and re-threading the machine, I was frustrated to find that it wouldn't chain. When a serger works properly, the stitch "chains."

Anyone who uses an older serger will tell you that they are difficult to thread. The instructions included with this one state that it's easier to have the salesperson thread it for you, then never un-thread it. When changing threads, just tie the new thread to the end of the old thread and draw it through the machine until the knot reaches the eye of the needle. Then simply snip the knot, thread the new length through the eye, and sew on and sew forth. I read and re-read the instructions (no help whatsoever) and watched the video that came with the machine 4 times, then admitted defeat and made an appointment to bring in the old gal to the sewing shop recommended by nearly every fabric store in town.

Grateful plug: Rich's Sew & Vac

They took one look at my big old baby and said, "You're using the wrong needles. That thing needs a cleaning. Come back in a week." Of course, they broke the news to me gently, and I knew they were right. But it was like limping along for a while and putting off a visit to the doctor for an ingrown toenail only to have the doctor tell you you need emergency foot surgery or you'll never walk again. Two months before you're scheduled to run in a marathon.

What I thought was me being in a hurry resulted in me not having my machine for a week while it not only had the needle problem addressed.

I'm excited to try it out, since the shop told me she should run faster and tighter than before. But I'm also enjoying the break and am getting other things done. (Ok, along with making bottle cap magnets and laundry basket tags... I'll post those projects over the weekend.)
Yay!

March 2, 2008

What's new on the cutting table?

While most of our plates are all the same, the PlateWrap choices are always changing.
This week we have a few new fabrics being cut for PlateWraps. Aren't these fun?


This funky zebra print will have a hot pink band around the back side. We decided to call this PlateWrap "Wild Thing."


These pink printed sunflowers have a hint of buttery yellow in them, so I found a matching buttery yellow fabric for the band around the back. Lovely. And perfect for spring. Too bad the print was limited, so this one will sell out fast. Of course, this one will be called "Pink Sunflowers."

March 1, 2008

Flat Jack needs your help

I've been clicking around IndiePublic today and found something fun to share here (and also on my family blog.)

Stained Glass Artist Laurie Beggin had a post on her blog asking for help with her friend Flat Jack.

Isn't this the neatest idea? A few of my friends and I once tried doing this with a real doll but the idea died because we couldn't find an exact replica to be a stunt double, and we didn't want any harm to come to the original doll.

Flat Jack will be traveling around western Oregon with me before being emailed back to Laurie. Can you help, too? If you copy Flat Jack and paste him into a word document, it'll be easy to resize him before printing. Then just cut him out and go have fun! Hurry - time is limited!
Powered By Blogger